Redemption Cemetery: Grave Testimony: Chapter 10: The End
The Redemption Cemetery: Grave Testimony Walkthrough will guide you through each chilling moment of this exciting hidden object adventure game. After witnessing a terrible murder, you find yourself at the mercy of gangsters on a cursed island moments from being buried alive. Suddenly, the gangsters are set upon by some unknown force and dragged under the deadly waters surrounding the island. Can you find your way off this cursed land alive? With our Redemption Cemetery: Grave Testimony Walkthrough you can!
Chapter 1: Intro and Skull Hill
Chapter 2: The Mining Town
Chapter 3: The Chapel
Chapter 4: The Mine
Chapter 5: The Small Town
Chapter 6: The Judge's House
Chapter 7: The Swamp
Chapter 8: The Secret Lab
Chapter 9: The Ship
Chapter 10: The End
Bonus Chapter
Ask for help in the comments below!
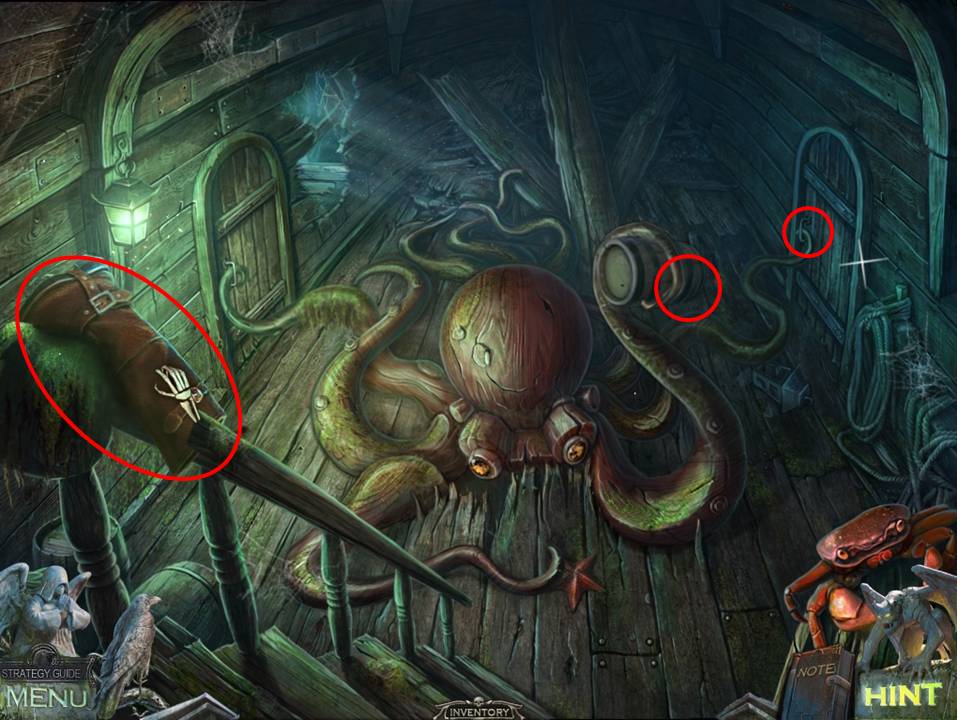
- Take the BOOT lying on the stair rail.
- Zoom into the barrel held by the octopus.
- Take the MAP.
- Zoom into the door on the right.
- Take the CORKSCREW.
-
Go below deck again by way of the bow.
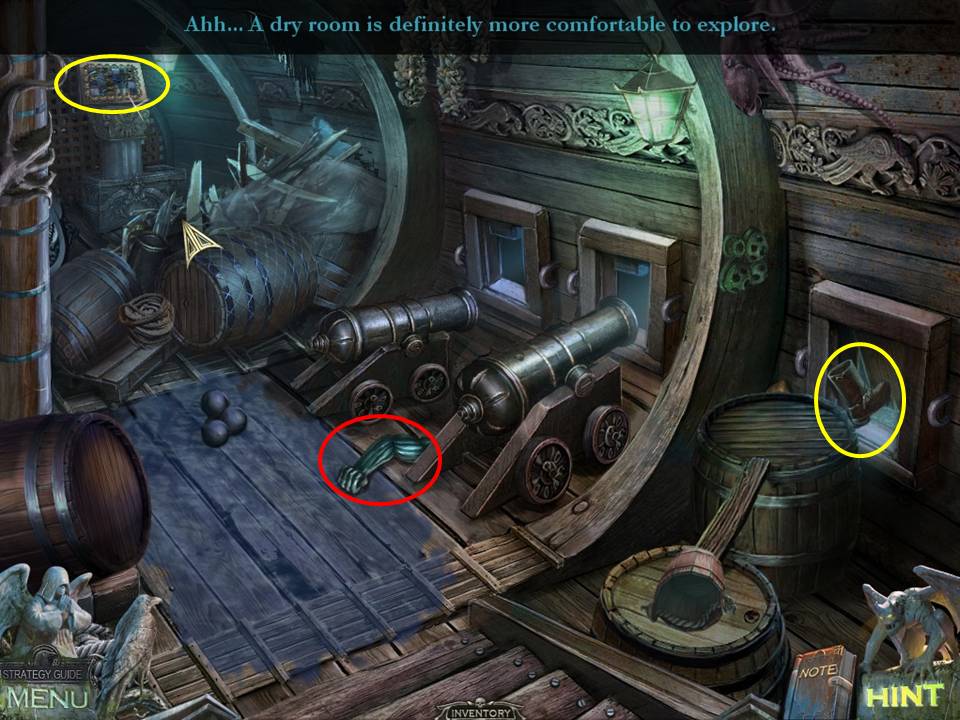
- Zoom into the underwater hatch at right.
- Wedge it open with the BOOT to drain the water – how does that BIG shark get out through such a small hole?
-
Take the STATUE HAND.
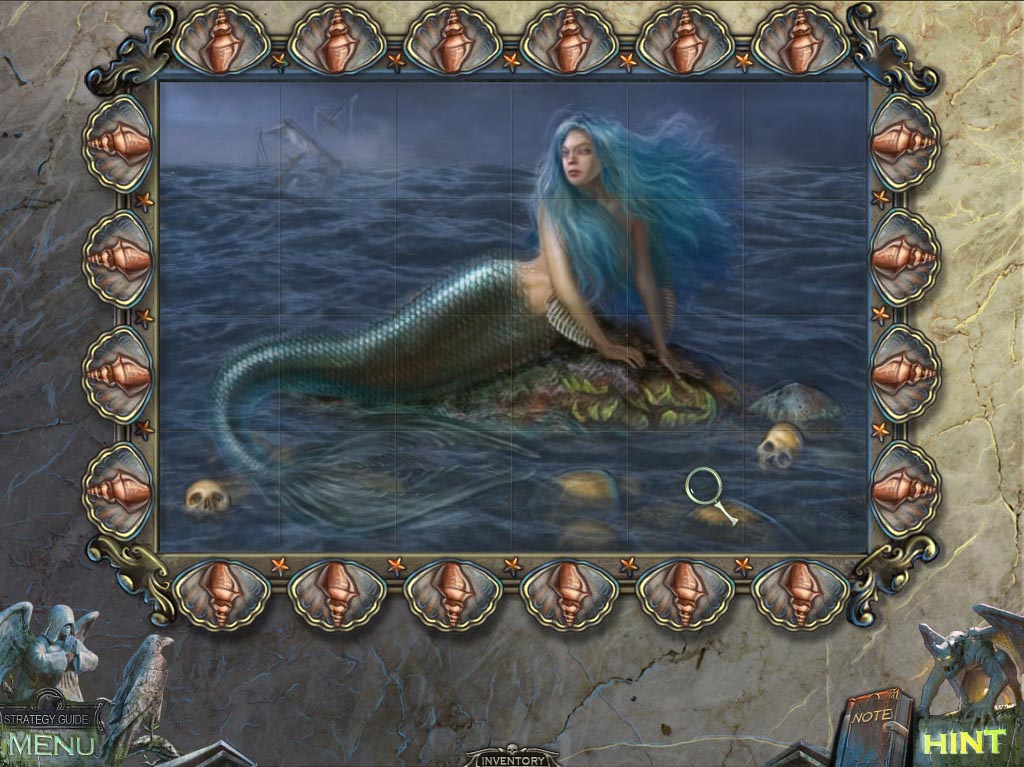
- Zoom into the pedestal at the top left corner.
- Complete the puzzle by swapping the pieces two at a time.
- The solution shows a mermaid image.
-
When finished, return to the bow.
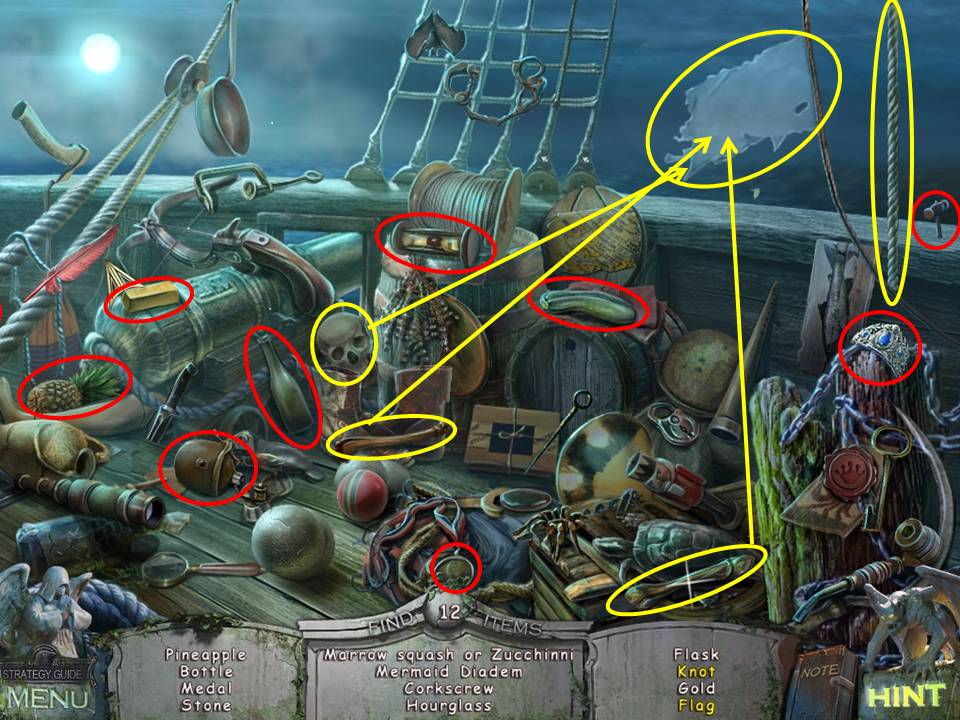
- Play the Hidden Object Area at lower right.
- Find the items listed.
- To obtain the knot, click on the rope hanging down on the right.
- The flag requires the skull and bones indicated to complete.
-
When finished, receive the DIADEM.
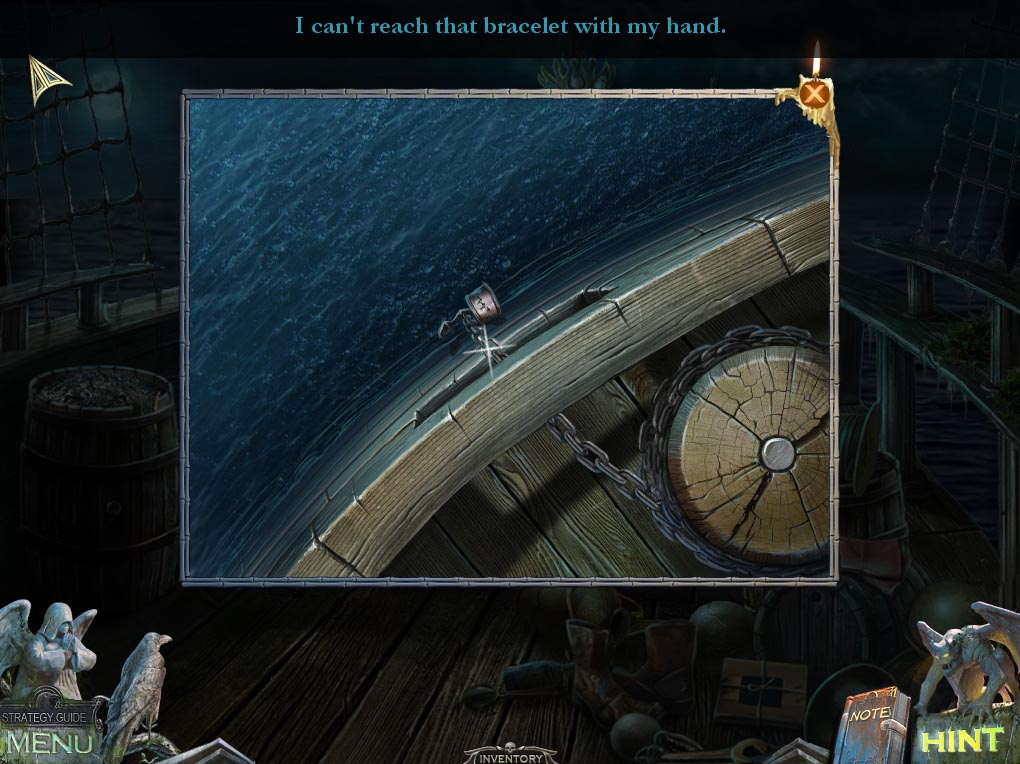
- Zoom into the statue on the bow.
- Place the STATUE HAND on the figure, making the anchor rise.
- Zoom into the anchor.
- Retrieve the BRACELET with the RAMROD WITH HOOK.
-
Go back below the bow.
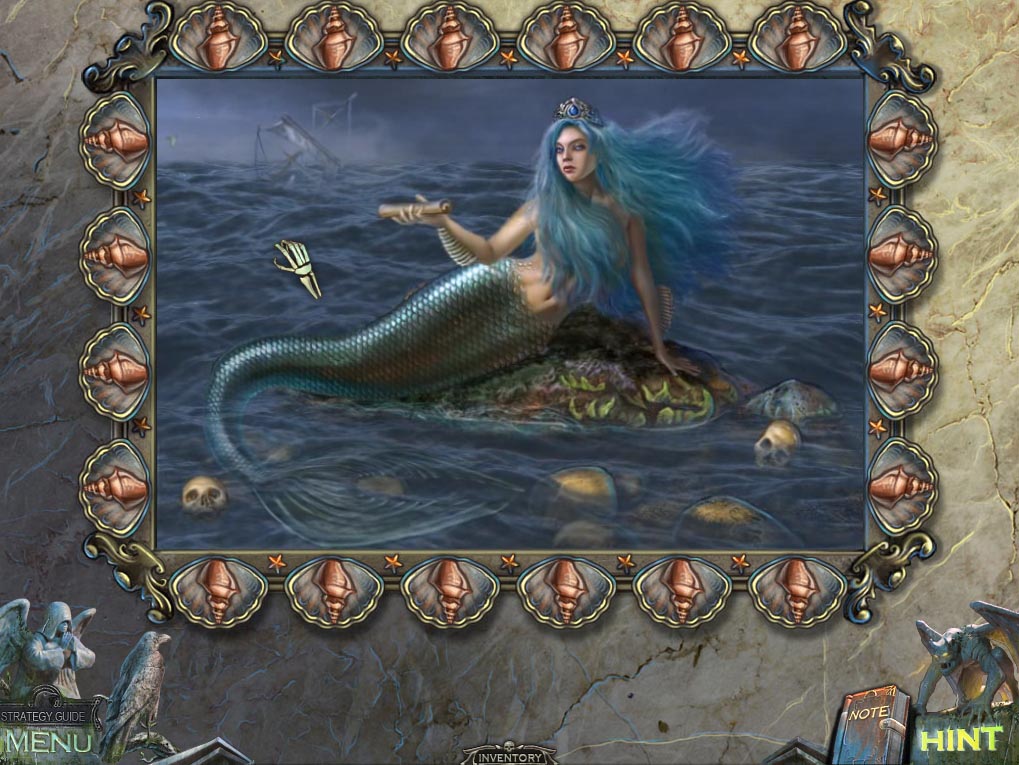
- Zoom into the pedestal with the mermaid puzzle.
- Give the mermaid the DIADEM.
-
Receive the MAP from the mermaid.
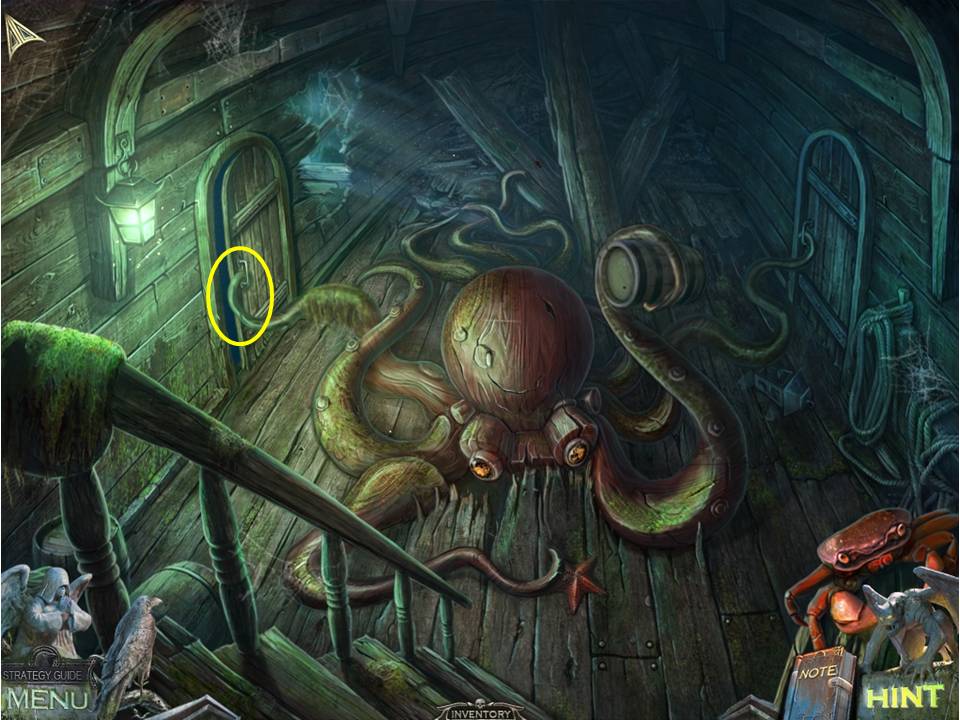
- Return to the hold below the main deck.
- Zoom into the door at left.
- Use the BRACELET on the niche in the tentacle, which opens the door.
-
Go through the door to the cell.
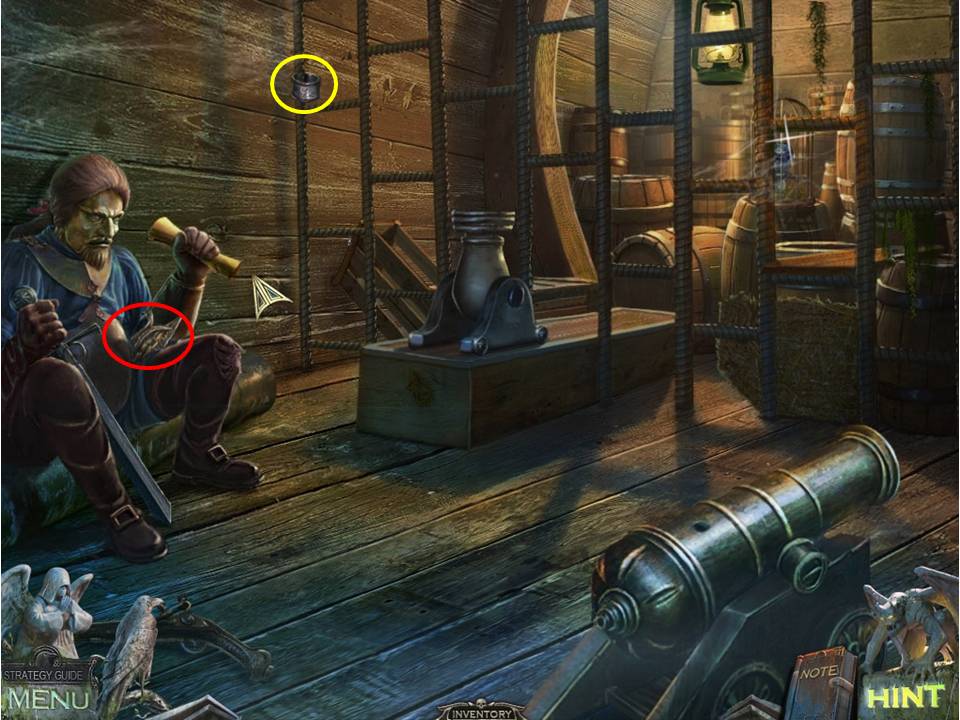
- Zoom into the statue at left.
- Take the TRIDENT TINES.
- Use RAMROD WITH HOOK to retrieve the BRACELET.
-
Go back out to the Hold.
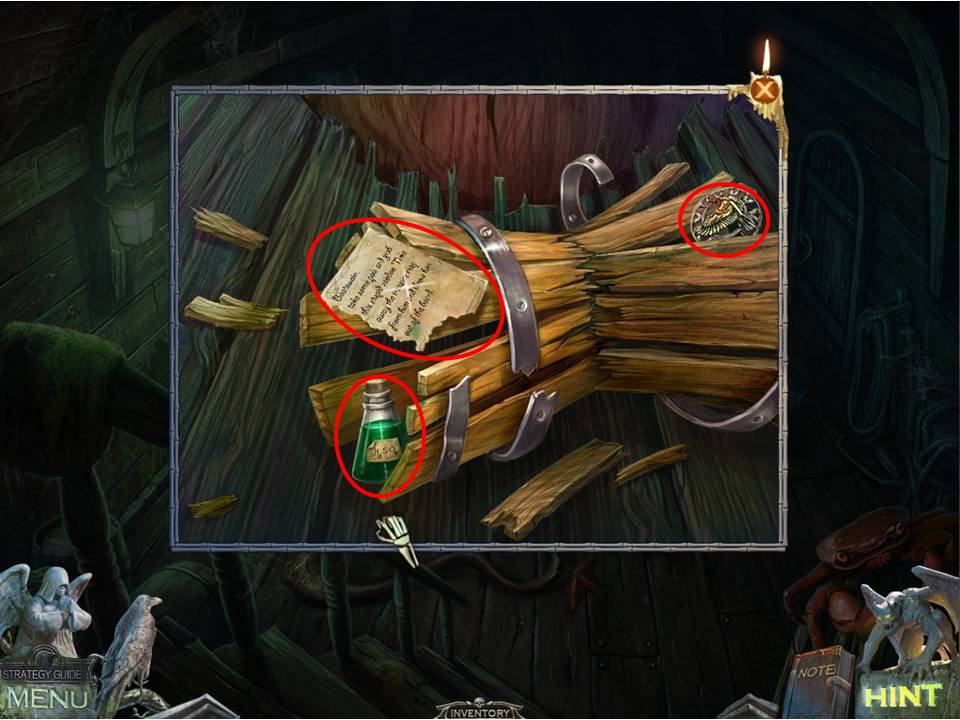
- Zoom into the octopus barrel.
- Use the BRACELET on the niche in the tentacle holding the barrel, which the octopus will destroy.
- Zoom in and read the note.
- Take the CROW RUNE and CORKED ACID.
-
Return to the Cell.
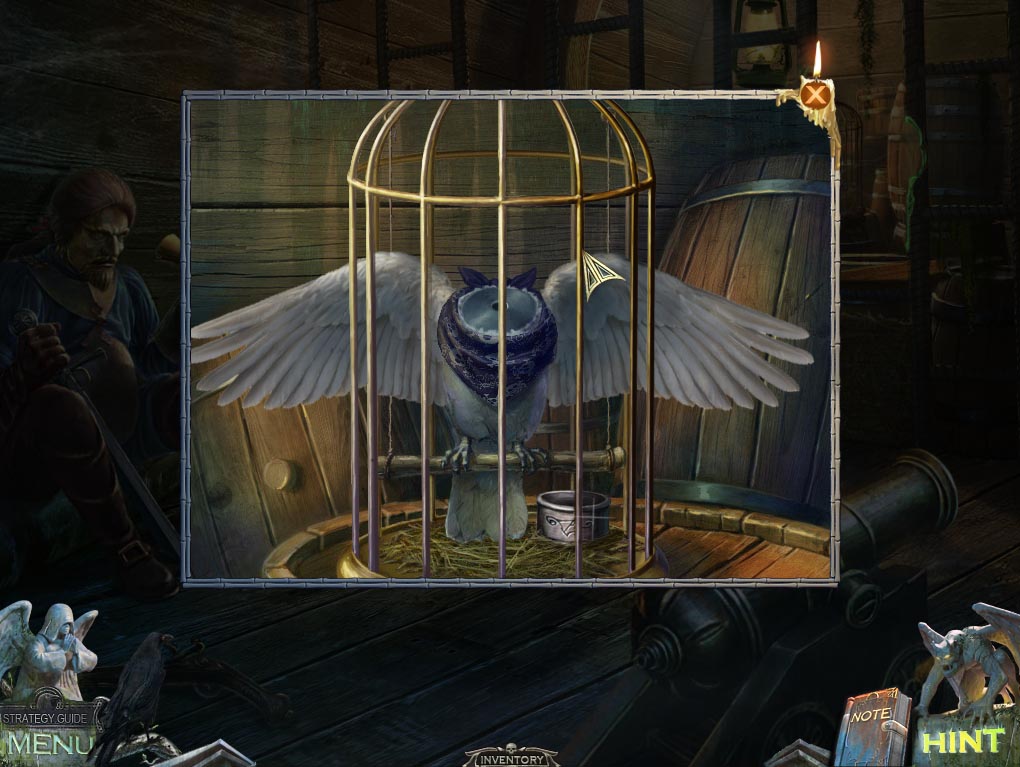
- Zoom into the rusted bars at right.
- Melt the bars with the CORKED ACID after using the CORKSCREW to open it.
- Zoom into the cage on the other side.
- Note the stuffed bird.
-
Take the BRACELET. Go back to the hold.
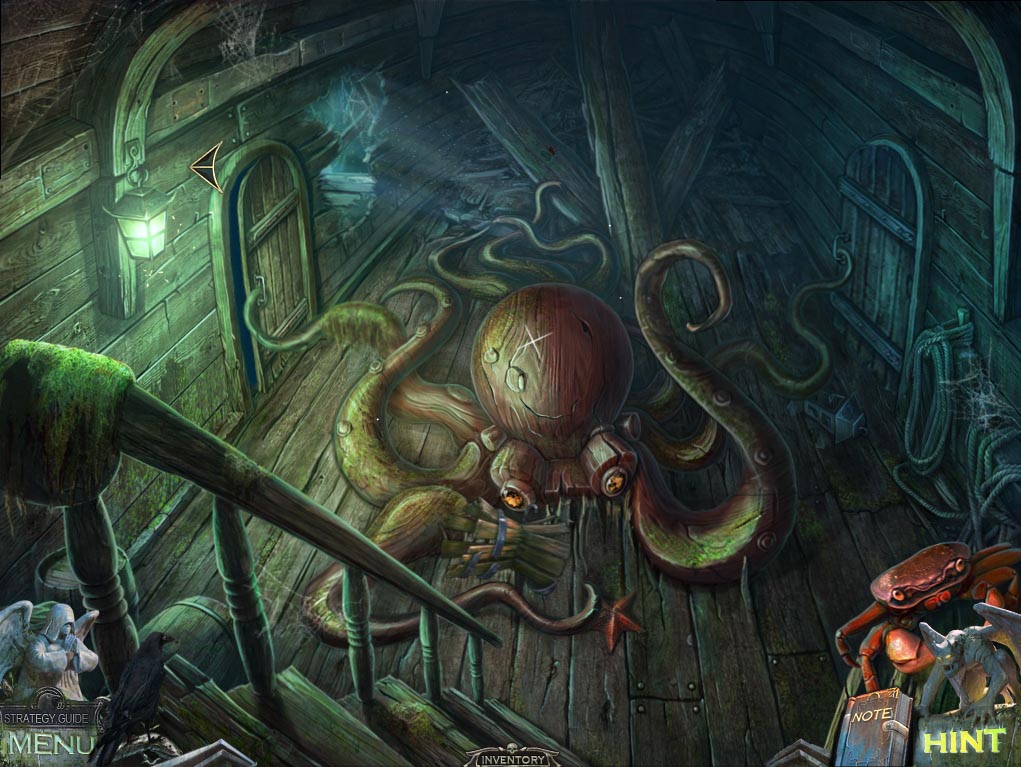
- Zoom into the door at right.
- Place the BRACELET on the niche in the tentacle, which opens the door.
-
Go through to the treasury.
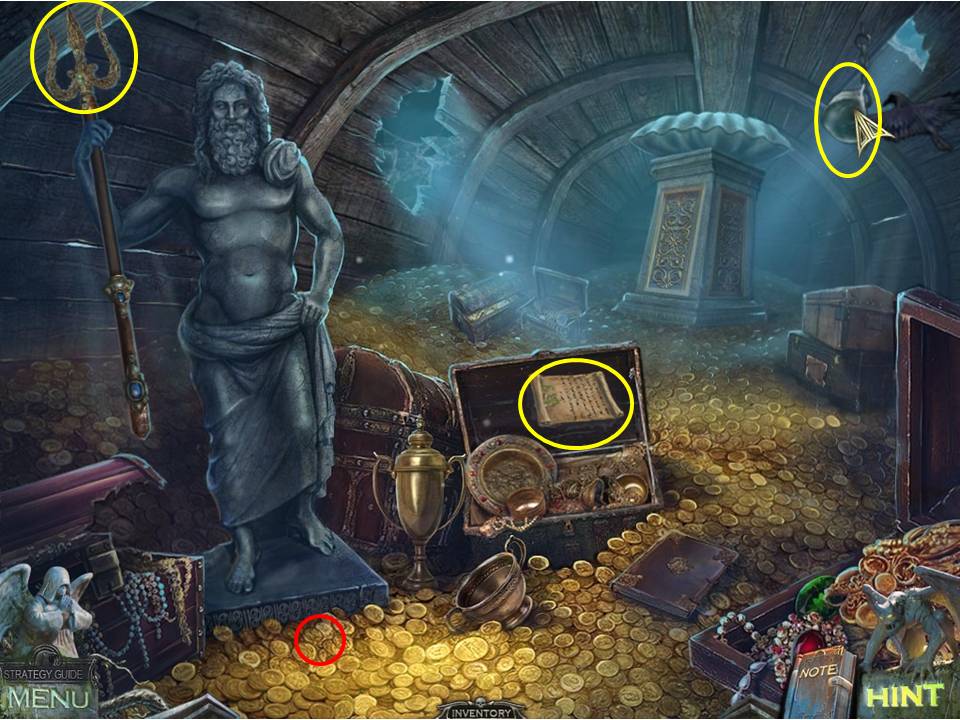
- Zoom into the statue’s trident.
- Place the TRIDENT TINES in their proper spots.
- When finished, take the PARROT HEAD lying near the statue’s base.
- Read the scroll on the treasure chest lid.
- Have the crow get the HELMET hanging on the upper right.
-
Return to the cell.
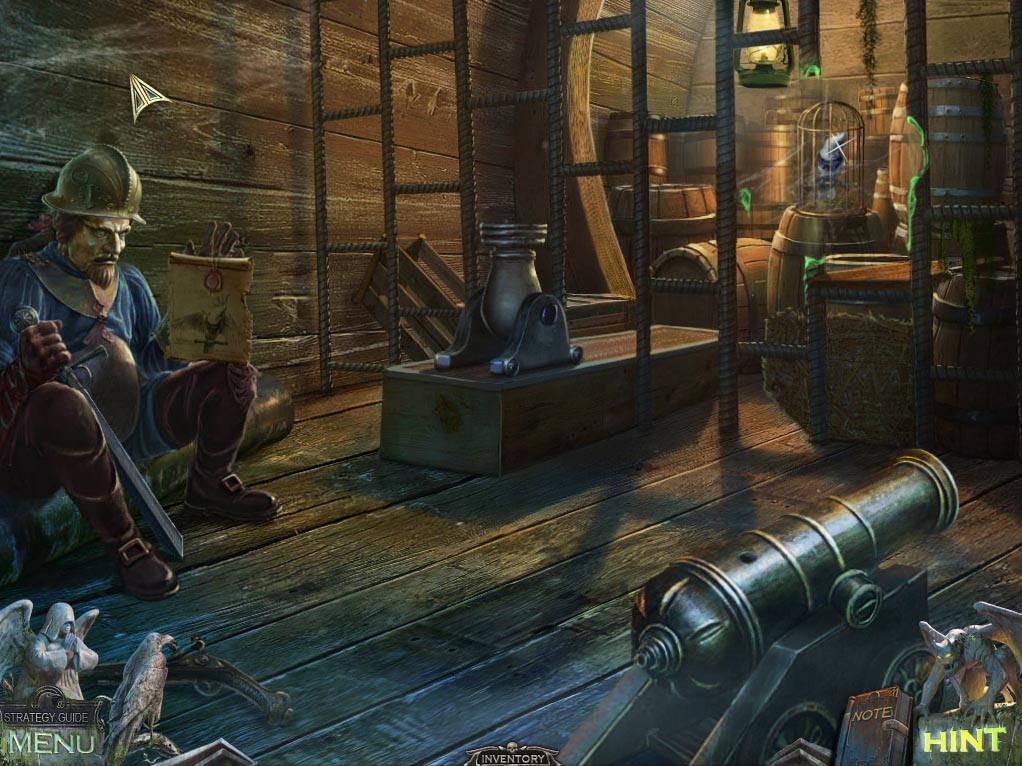
- Zoom into the statue at left.
- Place the HELMET on the statue's head.
- Take the MERMAID FIGURINE on the scroll and note the clue about the stuffed bird.
- Zoom into the stuffed parrot inside the cage within the cell.
- Place the PARROT HEAD on it.
-
Lower the right wing according to the clue on the scroll and take the MAP that miraculously appears in the parrot’s wingpit – phew, and you thought human armpits smelt bad!
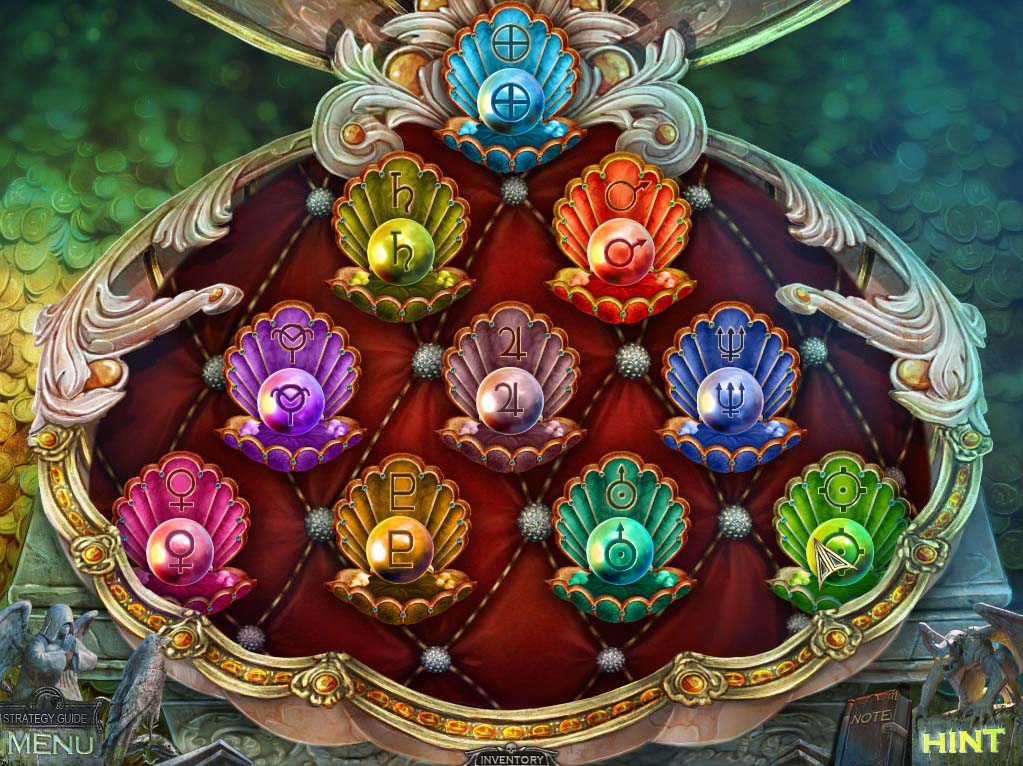
- Return to the treasury.
- Zoom into the clam on top of the pedestal.
- Place the MERMAID FIGURINE on the empty slot on the left to initiate a puzzle.
- The object of the puzzle is to swap adjacent pearls to put them into the shells matching their colors and symbols, though the puzzle does limit the directions you can move.
- Try starting at the corners. It’s a little tedious, as you can’t actually see the pearl moving around so you have to pay attention to be sure things have changed position in the desired fashion.
- See screenshot for solution.
-
When finished take the MAP in the center shell.
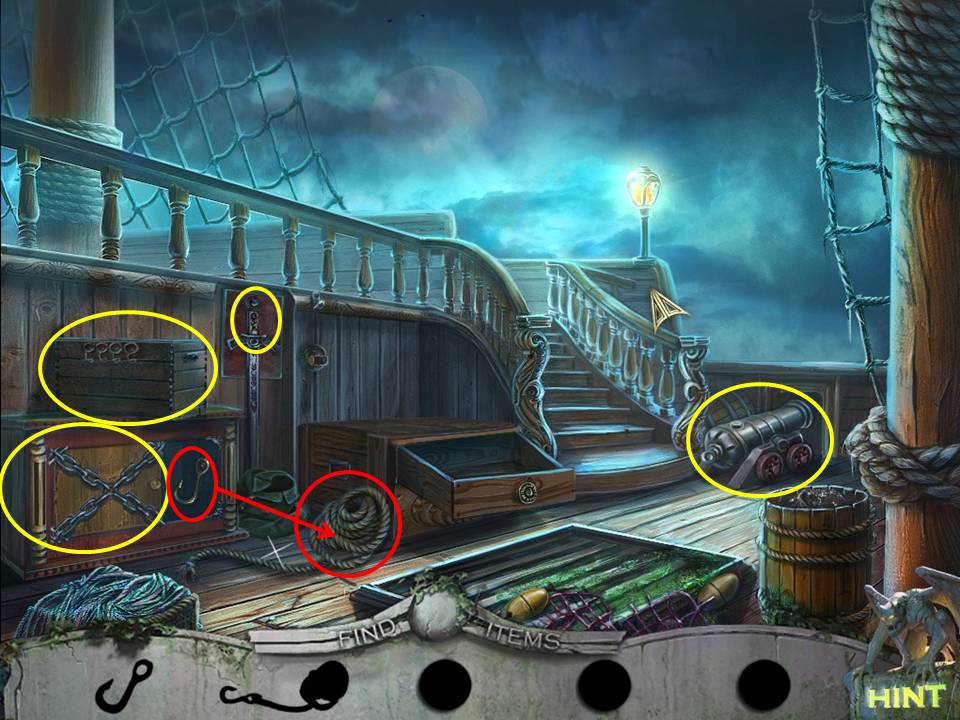
- Return to the main deck and initiate the sequential object puzzle by the broken mast.
- Find the silhouetted objects in the scene, using them to obtain the rest of the items in the following order
- Combine the hook with the rope to get the rope with hook.
- Attach the rope with hook to the cannon at right and chained box on the left.
- Push the cannon overboard, opening the chained box.
- Zoom into the box interior. Arrange the rune dials to open it – click on the left rune, press the red button until the slot on the outer circle lines up with the tumbler, then repeat the process with the remaining runes. Take the violet, red, and green gems inside.
- Zoom into the sword. Click the panels on the hilt to show until you get an image of a complete rose. Bottom panel should just show the stem, the center panel should have the stem and part of the rose, while the top panel should be all rose. Take the blue gem when it’s unlocked.
-
Use the violet, red, green, and blue gems on the slots in the box on the left. Swap pairs of gems until they match the colored lines below them.Take the MAP inside the chest.
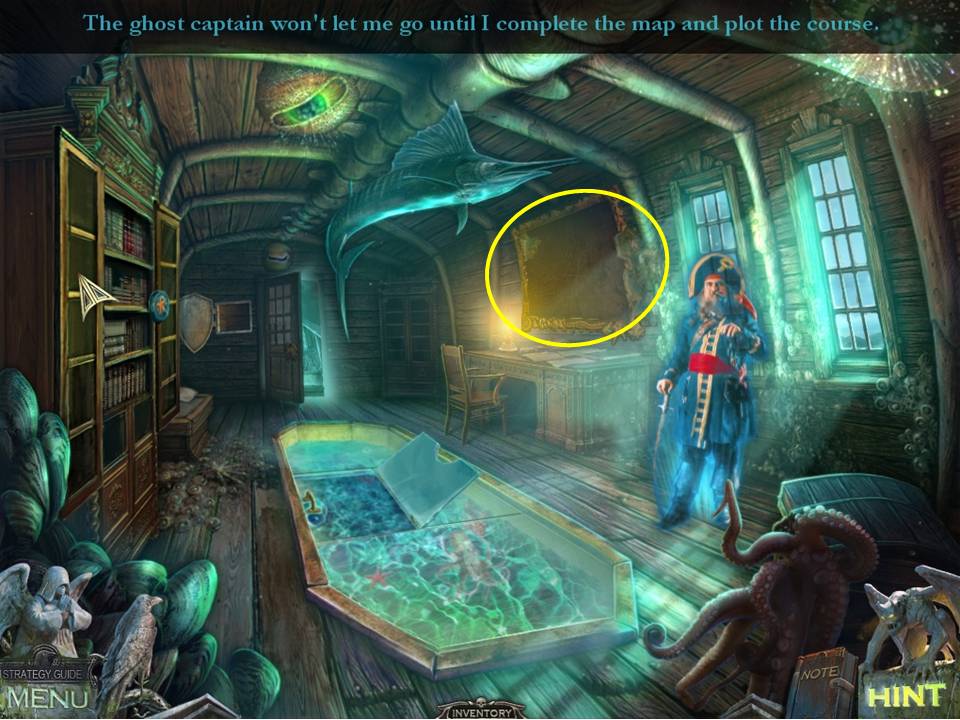
- Go to the Captain's quarters and talk to the ghost.
-
Zoom into the large frame on the wall on the right.
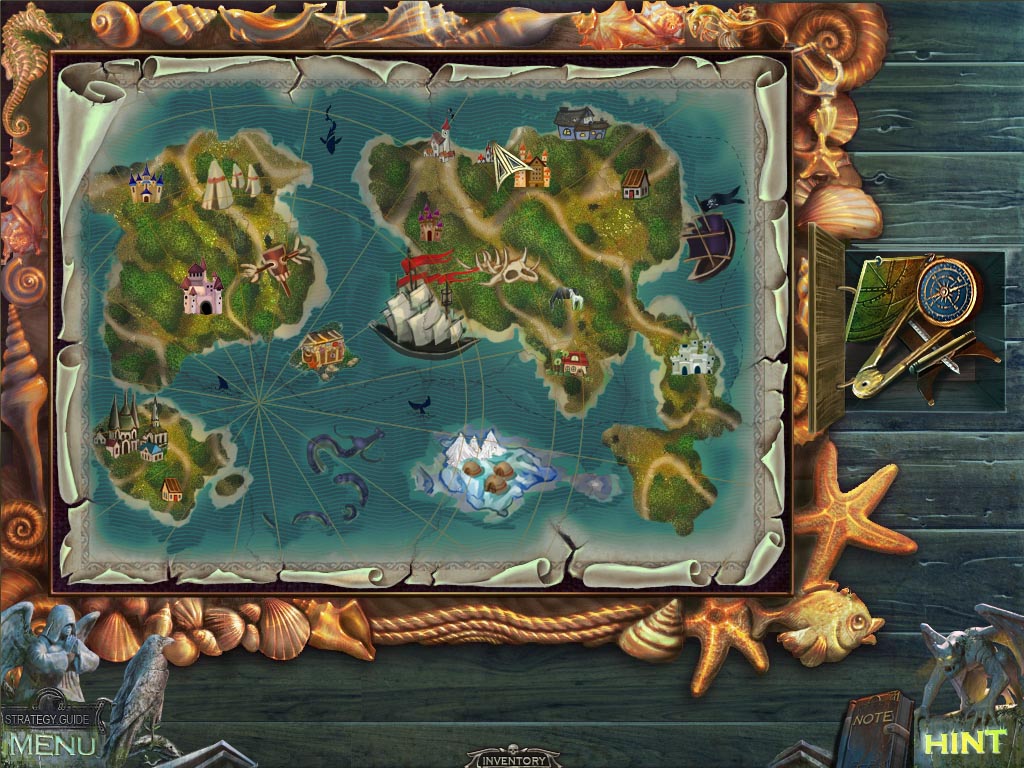
- Place the seven MAP pieces on the frame to initiate a puzzle.
- The object of the puzzle is to reassemble the map.
- Right click to rotate the pieces.
- Correctly placed pieces lock into place.
- See screenshot for solution.
- When finished, receive the GUIDES.
- Talk to the ghost again.
-
Return to the cabin of the first ship.

- Zoom into the chest at right.
- Place the GUIDES inside the compass box in the chest.
- Talk to the man in the bed.
- Receive the HOLD KEY.
-
Go to the deck.
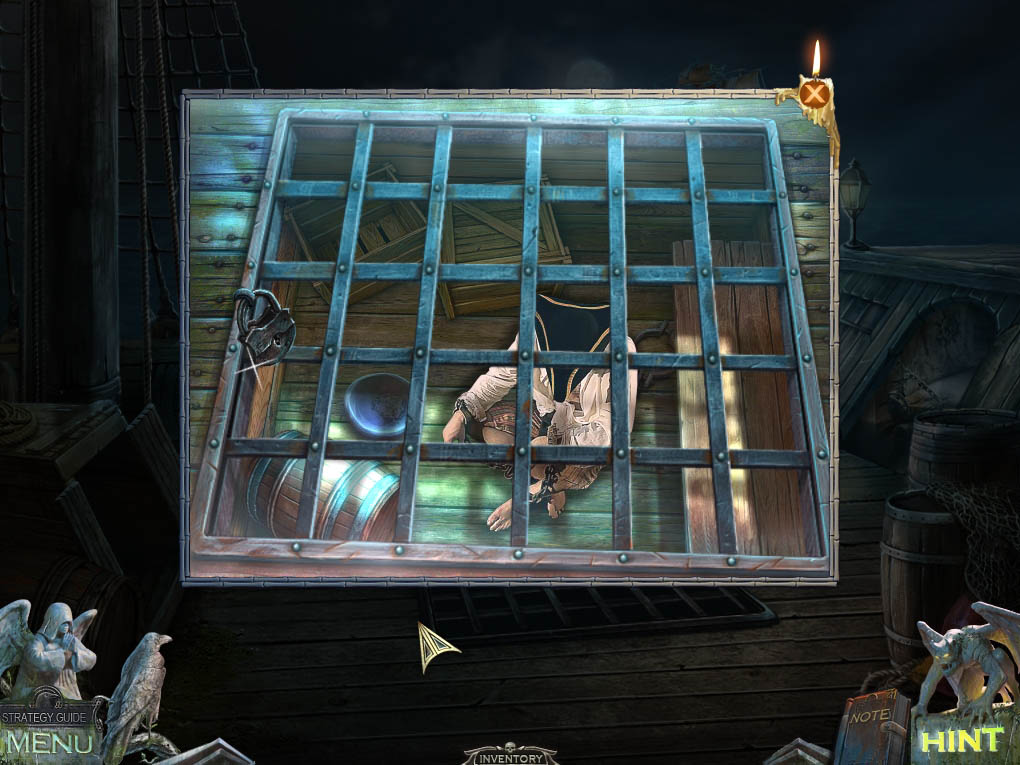
- Open it with the HOLD KEY.
- Free the prisoner.
-
You will be returned to the Lake of Death.
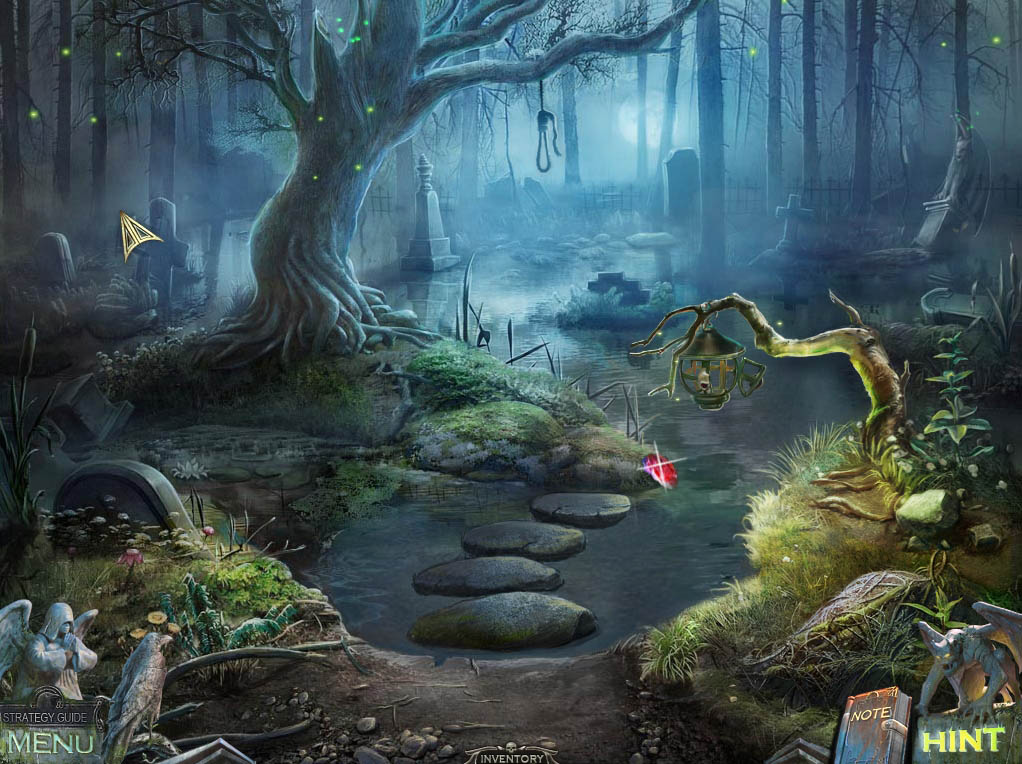
- Take the SOUL STONE.
-
Go to the dock.
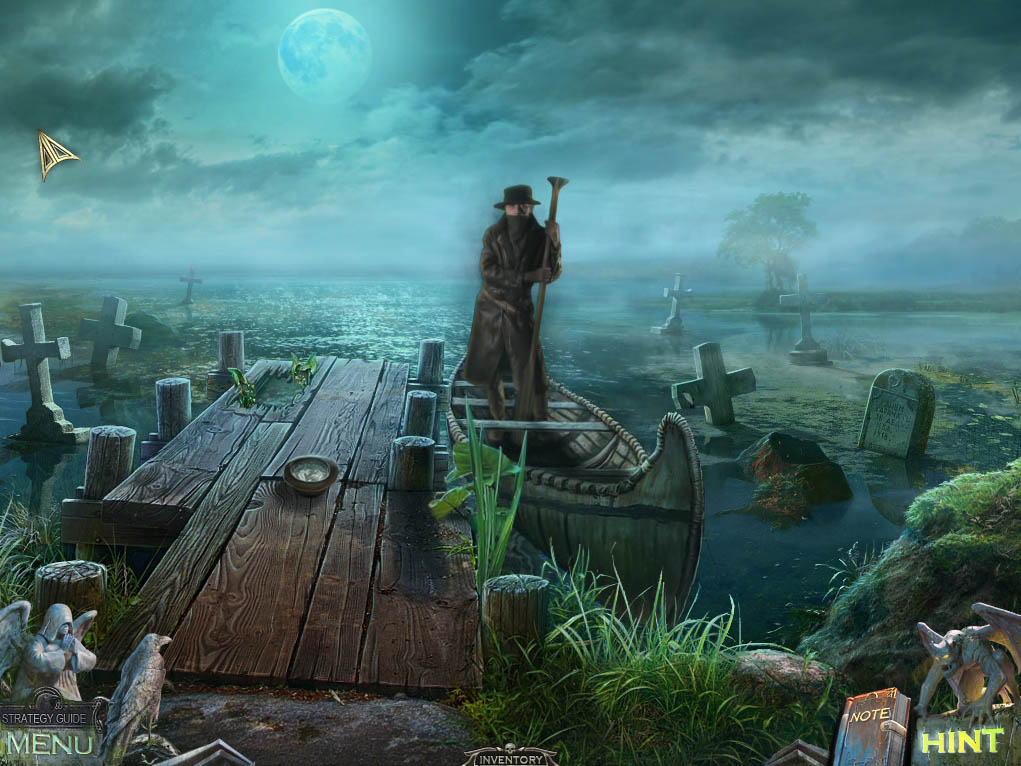
- Zoom into the ferryman.
- Give him the SOUL STONES.
- Watch the scene play out.
Congratulations – and you never thought you’d get out, did you? You've completed Redemption Cemetery: Grave Testimony. You may now access the bonus chapter. Return to the main menu and click on the “extras” button if you want to continue the adventure.
Chapter 1: Intro and Skull Hill
Chapter 2: The Mining Town
Chapter 3: The Chapel
Chapter 4: The Mine
Chapter 5: The Small Town
Chapter 6: The Judge's House
Chapter 7: The Swamp
Chapter 8: The Secret Lab
Chapter 9: The Ship
Chapter 10: The End
Bonus Chapter
Ask for help in the comments below!
